Home     Tutorials     Contact Us    

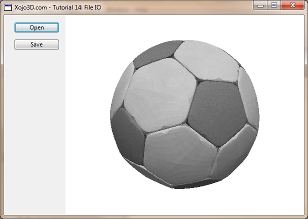
Tutorial 14: File IO

Saving 3D assets to disk, or transporting them across a network, is an important feature of any professional 3D application. The X3 Data Format is a simple open specification that can be used save and transport 3D assets. This tutorial shows you how to save and load 3D models using the X3 Data Format.
Windows Binary  OS X Binary (Cocoa)  Linux Binary (32 bit) 
Download Tutorial PDF  Download Xojo Project

Theory

The X3 Data Format is a data specification designed for the storage and transmission of 3D assets. The lightweight and basic structure of JSON makes it super easy to work with X3 assets.

The best way to illustrate the workings of the X3 Data Format is with an example. Below is the data of a basic cube:
{
  "x3model":{
    "vertex":[
      -1, 1, 1,
      1, -1, 1,
      1, 1, 1,
      -1, -1, 1,
      -1, -1, -1,
      -1, 1, -1,
      1, -1, -1,
      1, 1, -1
    ],
    "polygon":[
      {"vi":[0, 3, 1, 2]},
      {"vi":[0, 5, 4, 3]},
      {"vi":[2, 1, 6, 7]},
      {"vi":[2, 7, 5, 0]},
      {"vi":[1, 3, 4, 6]},
      {"vi":[7, 6, 4, 5]}
    ]
  }
}
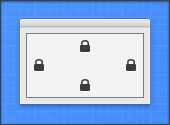
The x3model object indicates that this is an X3 model asset. The object contains all the information needed to render the model, such as geometrical data, colors, textures, etc. Below is an image of what the cube looks like. The orange spots indicate where the vetices are located.


The first child of x3model is the vertex object. This object stores all the 3D vertices used by the model, as a one-dimensional numerical array. The first three values in the array is the respective X, Y and Z values of the first vertex. The next three values in the array is the respective X, Y and Z values of the second vertex, and so forth ... This cube model has eight vertices stored in its global vertex array.


The second child of x3model, polygon, stores all the polygon objects of the model. Each polygon has different attributes such as color or texture, but in this cube example we only define the geometrical shape of the polygon by making use of the vi array. When no color or texture is set for the polygon, the polygon will automatically be rendered using a white color.

Six polygons are defined for the model, one polygon for each face of the cube. When we look at the first polygon, we see it is defined by vertices 0, 3, 1 and 2.


The image below illustrates some of the surfaces together with their respective index in the polygon array.


You can download the latest X3 Data Format Specification for the full list of features provided by the X3 Data Format.


Tutorial Steps

1. Create a new Xojo desktop project.
2. Save your project.
3. Import the X3Core module.
4. Import the X3IO module.
5. Configure the following controls:

Control Name Left Top Caption DoubleBuffer Maximize Button
Window SurfaceWindow - - - - ON
OpenGLSurface Surface 123 0 - ON -
Generic Button OpenButton 20 14 Open - -
Generic Button SaveButton 20 48 Save - -

6. Position and size Surface to fill the whole part of the window not occupied by the buttons, and set its locking to left, top, bottom and right.

7. Add the following code to the SurfaceWindow.Open event handler:

Self.MouseCursor = System.Cursors.StandardPointer

8. Add the following code to the SurfaceWindow.Paint event handler:

Surface.Render

9. Add the following code to the Surface.Open event handler:

X3_Initialize

X3_EnableLight OpenGL.GL_LIGHT0, new X3Core.X3Light(0, 0, 1)

10. Add the following code to the Surface.Resized event handler:

X3_SetPerspective Surface

11. Add the following properties to SurfaceWindow:

Name Type
Model X3Core.X3Model
MousePrevX Integer
MousePrevY Integer

12. Add the following code to the Surface.Render event handler:

OpenGL.glClearColor(1, 1, 1, 1)
OpenGL.glClear(OpenGL.GL_COLOR_BUFFER_BIT + OpenGL.GL_DEPTH_BUFFER_BIT)

OpenGL.glPushMatrix

OpenGL.glTranslatef 0, 0, -2.5

if Model <> nil then
  X3_RenderModel Model
end if

OpenGL.glPopMatrix

13. Add the following code to the Surface.MouseDown event handler:

MousePrevX = x
MousePrevY = y

return true

14. Add the following code to the Surface.MouseDrag event handler:

X3_RotateWithXY Model.Rotation, (y - MousePrevY), (x - MousePrevX)

Surface.Render

MousePrevX = x
MousePrevY = y

15. Add the following code to the OpenButton.Action event handler:

Dim dlg As new OpenDialog
Dim modFile As FolderItem
Dim x3mType As new FileType

x3mType.Name = "X3 Model"
x3mType.Extensions = "x3m"

dlg.Filter = x3mType

modFile = dlg.ShowModal()

if modFile <> nil then
  Model = X3IO_LoadModel(modFile)
  Surface.Render
end if

16. Add the following code to the SaveButton.Action event handler:

Dim dlg As new SaveAsDialog
Dim modFile As FolderItem
Dim x3mType As new FileType

x3mType.Name = "X3 Model"
x3mType.Extensions = "x3m"

dlg.Filter = x3mType

modFile = dlg.ShowModal()

if modFile <> nil then
  if Right(modFile.Name, 4) <> ".x3m" then
    modFile.Name = modFile.Name + ".x3m"
  end if
  X3IO_SaveModel(Model, modFile)
end if

17. Download and extract the test model.
18. Save and run your project. Open the test model with the open button.

Analysis

The X3IO module contains the required methods to respectively load and save X3 assets, to and from files.

OpenButton.Action:

Dim dlg As new OpenDialog
Dim modFile As FolderItem
Dim x3mType As new FileType

x3mType.Name = "X3 Model"
x3mType.Extensions = "x3m"

dlg.Filter = x3mType

modFile = dlg.ShowModal()

if modFile <> nil then
  Model = X3IO_LoadModel(modFile)
  Surface.Render
end if
X3 models are stored in files with the extension .x3m. In the code above the x3mType object defines this extension, and is used together with an OpenDialog object to select a model to load.

To load an X3 model from a file is simply a matter of calling the method X3IO_LoadModel, with a FolderItem as a parameter that points to the file, and assigning the result to your model object.
SaveButton.Action:

Dim dlg As new SaveAsDialog
Dim modFile As FolderItem
Dim x3mType As new FileType

x3mType.Name = "X3 Model"
x3mType.Extensions = "x3m"

dlg.Filter = x3mType

modFile = dlg.ShowModal()

if modFile <> nil then
  if Right(modFile.Name, 4) <> ".x3m" then
    modFile.Name = modFile.Name + ".x3m"
  end if
  X3IO_SaveModel(Model, modFile)
end if
Saving an X3 model is just as easy as loading a model. Simply call the X3IO_SaveModel method, with the model to be saved as the first parameter, and a FolderItem that points to the location where the model should be saved as the second parameter.
     

Xojo3D.com is not associated with Xojo, Inc. All the content on Xojo3D.com, unless indicated otherwise, is provided to the public domain and everyone is free to use, modify, republish, sell or give away this work without prior consent from anybody. Content is provided without warranty of any kind. Under no circumstances shall the author(s) or contributor(s) be liable for damages resulting directly or indirectly from the use or non-use of the content.