 |
Tutorial 9: Light sources Similar to photography, lighting is essential when creating exceptional 3D scenes. In this tutorial you will learn how to add light sources to your scenes. |


 |
 |
 |
 |
| Control | Name | DoubleBuffer | Left | Top | Maximize Button |
| Window | SurfaceWindow | - | - | - | ON |
| OpenGLSurface | Surface | ON | 0 | 0 | - |
|
| Self.MouseCursor = System.Cursors.StandardPointer |
| Surface.Render |
| X3_SetPerspective Surface |
| Name | Type |
| Alpha | Double |
|
Function GetMemoryBlock() As MemoryBlock Dim mblock As new MemoryBlock(16) mblock.SingleValue(0) = Red mblock.SingleValue(4) = Green mblock.SingleValue(8) = Blue mblock.SingleValue(12) = Alpha return mblock End Function |
|
Sub Constructor(initRed As Double, initGreen As Double, initBlue As Double, initAlpha As Double = 1) Red = initRed Green = initGreen Blue = initBlue Alpha = initAlpha End Sub |
| Name | Type |
| Normal | X3Vector |
|
Sub Constructor() Normal = new X3Vector(0, 0, 0) End Sub |
|
Sub Constructor(normalX As Double, normalY As Double, normalZ As Double) Normal = new X3Vector(normalX, normalY, normalZ) End Sub |
| Name | Type |
| Ambient | X3Color |
| Diffuse | X3Color |
| Position | X3Vector |
| Specular | X3Color |
|
Sub Constructor(xPos As Double, yPos As Double, zPos As Double) Position = new X3Vector(xPos, yPos, zPos) Ambient = new X3Color(0, 0, 0, 1) Diffuse = new X3Color(1, 1, 1, 1) Specular = new X3Color(1, 1, 1, 1) End Sub |
|
Function GetMemoryBlock() As MemoryBlock Dim mblock As new MemoryBlock(16) mblock.SingleValue(0) = X mblock.SingleValue(4) = Y mblock.SingleValue(8) = Z mblock.SingleValue(12) = 0 return mblock End Function |
|
OpenGL.glEnable OpenGL.GL_DEPTH_TEST OpenGL.glDepthMask OpenGL.GL_TRUE OpenGL.glCullFace OpenGL.GL_BACK OpenGL.glEnable OpenGL.GL_CULL_FACE OpenGL.glEnable OpenGL.GL_LIGHTING OpenGL.glEnable OpenGL.GL_COLOR_MATERIAL |
|
Sub X3_EnableLight(lightIndex As Integer, light As X3Core.X3Light) OpenGL.glLightfv lightIndex, OpenGL.GL_POSITION, light.Position.GetMemoryBlock OpenGL.glLightfv lightIndex, OpenGL.GL_AMBIENT, light.Ambient.GetMemoryBlock OpenGL.glLightfv lightIndex, OpenGL.GL_DIFFUSE, light.Diffuse.GetMemoryBlock OpenGL.glLightfv lightIndex, OpenGL.GL_SPECULAR, light.Specular.GetMemoryBlock OpenGL.glEnable lightIndex End Sub |
|
Dim i, j As Integer Dim poly As X3Core.X3Polygon OpenGL.glBegin OpenGL.GL_TRIANGLES for i = 0 to model.Polygon.Ubound poly = model.Polygon(i) if poly.FillColor <> nil then OpenGL.glColor3d(poly.FillColor.Red, poly.FillColor.Green, poly.FillColor.Blue) else OpenGL.glColor3d(1, 1, 1) end if OpenGL.glNormal3d poly.Normal.X, poly.Normal.Y, poly.Normal.Z for j = 0 to poly.Vertex.Ubound OpenGL.glVertex3d poly.Vertex(j).X, poly.Vertex(j).Y, poly.Vertex(j).Z next j next i OpenGL.glEnd |
|
X3_Initialize X3_EnableLight OpenGL.GL_LIGHT0, new X3Core.X3Light(0, 0, 1) |
|
OpenGL.glPushMatrix OpenGL.glClearColor(0, 0, 0, 1) OpenGL.glClear(OpenGL.GL_COLOR_BUFFER_BIT + OpenGL.GL_DEPTH_BUFFER_BIT) OpenGL.glTranslatef 0, 0, -5.0 OpenGL.glRotated(30, 1, 0, 0) OpenGL.glRotated(30, 0, 1, 0) X3_RenderModel X3Test_Cube2 OpenGL.glPopMatrix |
|
Sub Constructor(initRed As Double, initGreen As Double, initBlue As Double, initAlpha As Double = 1) Red = initRed Green = initGreen Blue = initBlue Alpha = initAlpha End Sub |
| The new constructor of X3Color now has an optional initAlpha parameter with a default value of 1. This parameter is used to instantiate the new Alpha property added to X3Color. The alpha value determines the transparency of a color, with 1 being completely opaque (not see through) and 0 being completely transparent (see through). |
|
Sub Constructor() Normal = new X3Vector(0, 0, 0) End Sub |
| The first constructor simply initializes the normal of the polygon to a NULL vector if default values aren't provided for the normal. |
|
Sub Constructor(normalX As Double, normalY As Double, normalZ As Double) Normal = new X3Vector(normalX, normalY, normalZ) End Sub |
| The second constructor initializes the normal of the polygon using the values provided by the parameters of the constructor. |
|
Sub Constructor(xPos As Double, yPos As Double, zPos As Double) Position = new X3Vector(xPos, yPos, zPos) Ambient = new X3Color(0, 0, 0, 1) Diffuse = new X3Color(1, 1, 1, 1) Specular = new X3Color(1, 1, 1, 1) End Sub |
| An OpenGL light source has many adjustable properties. Our constructor simply sets up the position of the light source, and default values for the ambient, diffuse and specular properties that should be sufficient for most purposes. |
|
OpenGL.glEnable OpenGL.GL_LIGHTING OpenGL.glEnable OpenGL.GL_COLOR_MATERIAL |
|
Two new instructions were added to our X3_Initialize method. The first instruction enables OpenGL's lighting. Without this instruction light sources will be ignored during rendering. Enabling OpenGL lighting disables the glColor command. By enabling GL_COLOR_MATERIAL with our second instruction, the glColor instruction works again when lighting is enabled. |
|
Sub X3_EnableLight(lightIndex As Integer, light As X3Core.X3Light) OpenGL.glLightfv lightIndex, OpenGL.GL_POSITION, light.Position.GetMemoryBlock OpenGL.glLightfv lightIndex, OpenGL.GL_AMBIENT, light.Ambient.GetMemoryBlock OpenGL.glLightfv lightIndex, OpenGL.GL_DIFFUSE, light.Diffuse.GetMemoryBlock OpenGL.glLightfv lightIndex, OpenGL.GL_SPECULAR, light.Specular.GetMemoryBlock OpenGL.glEnable lightIndex End Sub |
|
The X3_EnableLight method is simply a helper method that makes it easier for us to configure OpenGL with our X3Light objects. The OpenGL environment can be configured with up to GL_MAX_LIGHTS light sources. The first parameter, lightIndex, is the identifier of the light source of to be configured. This value can be anything between 0 and GL_MAX_LIGHTS). The second X3Light parameter is the light source to configure. |
|
Dim i, j As Integer Dim poly As X3Core.X3Polygon OpenGL.glBegin OpenGL.GL_TRIANGLES for i = 0 to model.Polygon.Ubound poly = model.Polygon(i) if poly.FillColor <> nil then OpenGL.glColor3d(poly.FillColor.Red, poly.FillColor.Green, poly.FillColor.Blue) else OpenGL.glColor3d(1, 1, 1) end if OpenGL.glNormal3d poly.Normal.X, poly.Normal.Y, poly.Normal.Z for j = 0 to poly.Vertex.Ubound OpenGL.glVertex3d poly.Vertex(j).X, poly.Vertex(j).Y, poly.Vertex(j).Z next j next i OpenGL.glEnd |
|
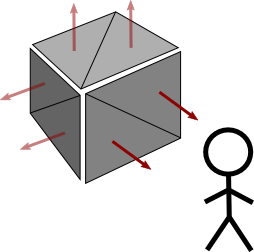
X3Core.X3_RenderModel has one new instruction added to it... glNormal3d. This instruction simply sets up the normal of the next polygon to be drawn, to ensure that OpenGL can apply the correct lighting effects to the polygon, based on the direction that the polygon is facing. |
|
|